18 KiB
Publishing a Crate to Crates.io
We have used packages form crates.io as dependencies of our pojects.
You could also share your code with others by publishing your own packages.
The crate regsitry at crates.io distributes the source code of your packages, it primarily hosts code that is open source.
Rust and Cargo have features that make your published package easier for people to find and use.
These features will be covered later and then explaining how to publish a package
Making Useful Documentation Comments
Accurately documenting your packages will others know how and when to use them.
It is worth investing the time to write documentation
In ch we said that to comment in Rust you use two slashes, //
Rust also has a pariticualr kind of comment for documentation.
This is known conveniently as a documentation comments, that will generate HTML documentation.
The HTML diesplays the contents of documentation comments for public API items intended for programmers interested in knowing how to use your crate as opposed to how your crate is implemented.
The documentation comments uses three slashes /// instead of two and this supports Markdown notation for formatting the text.
The placement of documentation comments just before the item they are documenting.
Here is an example of documentation comments for an add_one function in a crate named my_crate.
/// Adds one to the number given.
///
/// # Examples
///
/// ```
/// let arg = 5;
/// let answer = my_crate::add_one(arg);
///
/// assert_eq!(6, answer);
/// ```
pub fn add_one(x: i32) -> i32 {
    x + 1
}
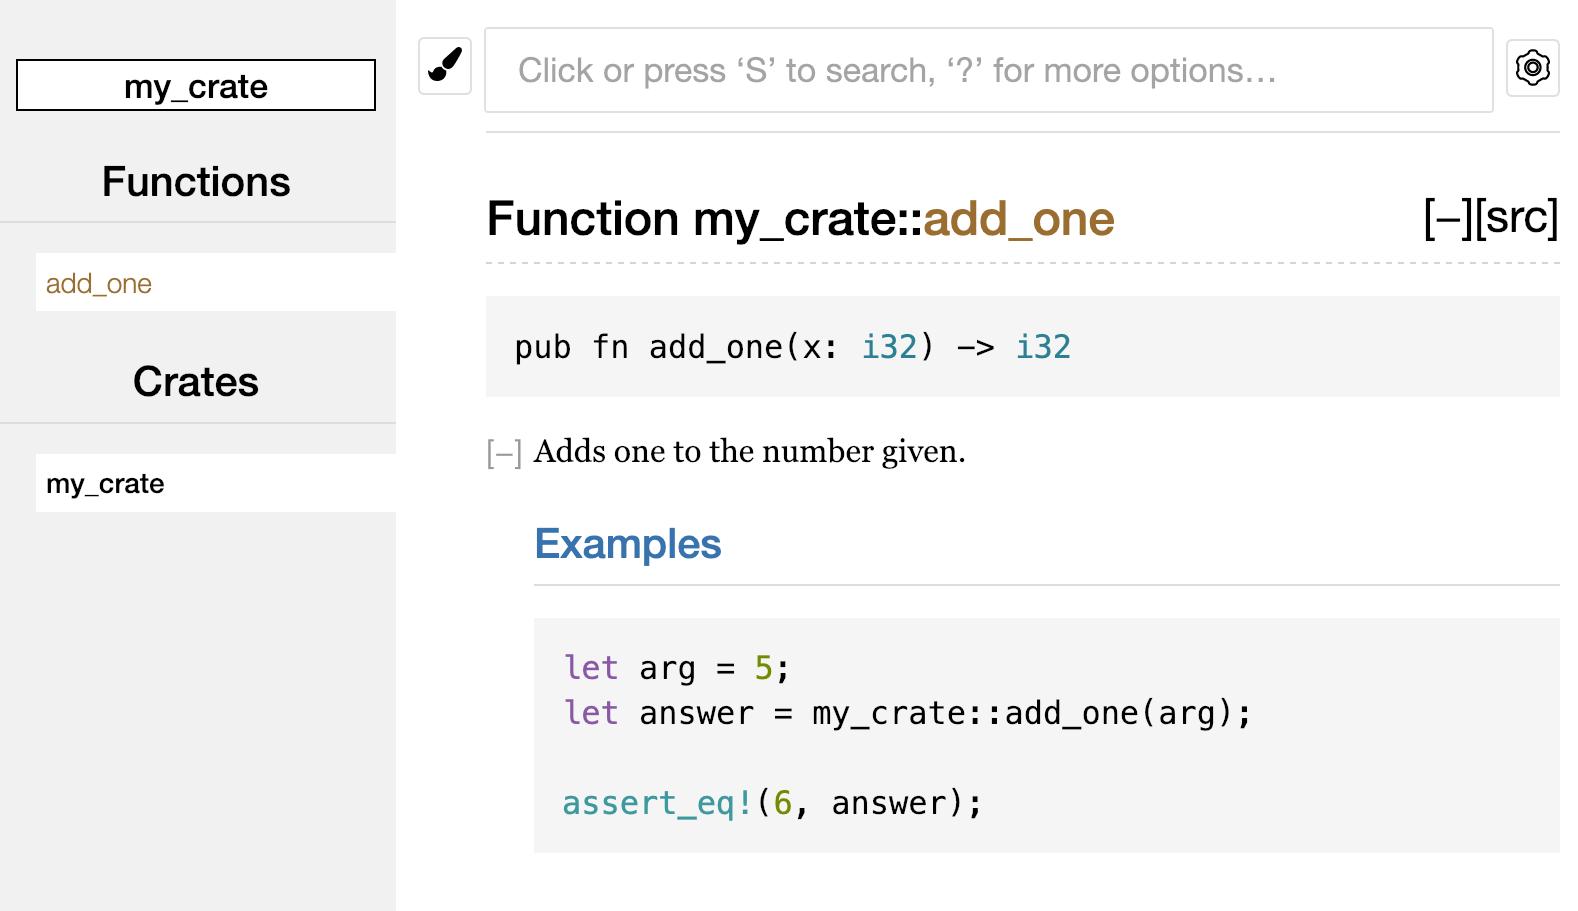
Here we first give a description of what the add_one function does.
Then we add a section starting with the heading Examples, and then provide code that demonstrates how to use the add_one function.
We can generate te HTML documentation from this documentation comment by running cargo doc.
This command runs the rsutdoc tool which comes distributed with Rust and pts the generated HTML documentation in the target/doc directory.
For convenience running cargo doc --open will build the HTML for your current crate's documentation as well as the documentation for all of your crate's dependencies then it will open the result in a web browser.
Navigating to the add_one function you will see how the texxt in the documentation comments is rendered as shown below
Commonly Used Sections
We previously used the # Examples Markdown heading to create a section in the HTML with the titl "Examples".
Here are some other secions that crate author commonly use in the documentation
- Panics: The scenarios in which the function being documented could panic. Funtion callers who don't want thier programs to panic should make sure they dont call the function in this way/situation
- Errors: If the function returns a
Result, that describes the kinds of errors that may occur and what conditions might cause those errors to be returned. This can be helpful to caller so that they can write code to handle different kinds of errors in different ways. - Safety: If the function is inheritly
unsafeto call, there should be a section explaing why the function is unsafe and covering the invariants that the function expects callers to uphold.
Most documentation comments don't need all of these sctions but this is a good checklist ot remind you of the aspects of your code users will be interested in knowing.
Documentation Comments as Tests
Adding example code blocks in your documentation comments can help demonstrate how to use the library.
Doing so also has an addtional bonus: running cargo test will run the code examples in your documentation as tests
This ensures that your examples will be tested to work, because that would be the worst to ship an example that doesn't work.
If we run cargo test with the documentation for add_one function we would get this output
   Doc-tests my_crate

running 1 test
test src/lib.rs - add_one (line 5) ... ok

test result: ok. 1 passed; 0 failed; 0 ignored; 0 measured; 0 filtered out; finished in 0.27s
Now if we change either the function or the example so the assert_eq! in the example panics, then we will see that the doc tests catch that the example and the code are out of sync with each other.
Commenting Contained Items
The style of commnet //! adds documentation to the item that contains the comments rather than to the items following the comments.
We typically use these doc comments inside the crate root file (src/lib.rs by convention) or inside a module to document the crate or the module as a whole.
For example, adding documentation that describes the purpose of the my_crate that contains the add_one function
We add documentation comments qith //! to the beginning of the src/lib.rs file
Here is an example of this
//! # My Crate
//!
//! `my_crate` is a collection of utilities to make performing certain
//! calculations more convenient.

/// Adds one to the number given.
// --snip--
///
/// # Examples
///
/// ```
/// let arg = 5;
/// let answer = my_crate::add_one(arg);
///
/// assert_eq!(6, answer);
/// ```
pub fn add_one(x: i32) -> i32 {
    x + 1
}
Notice that there isn't any code after the last line that begins with //!
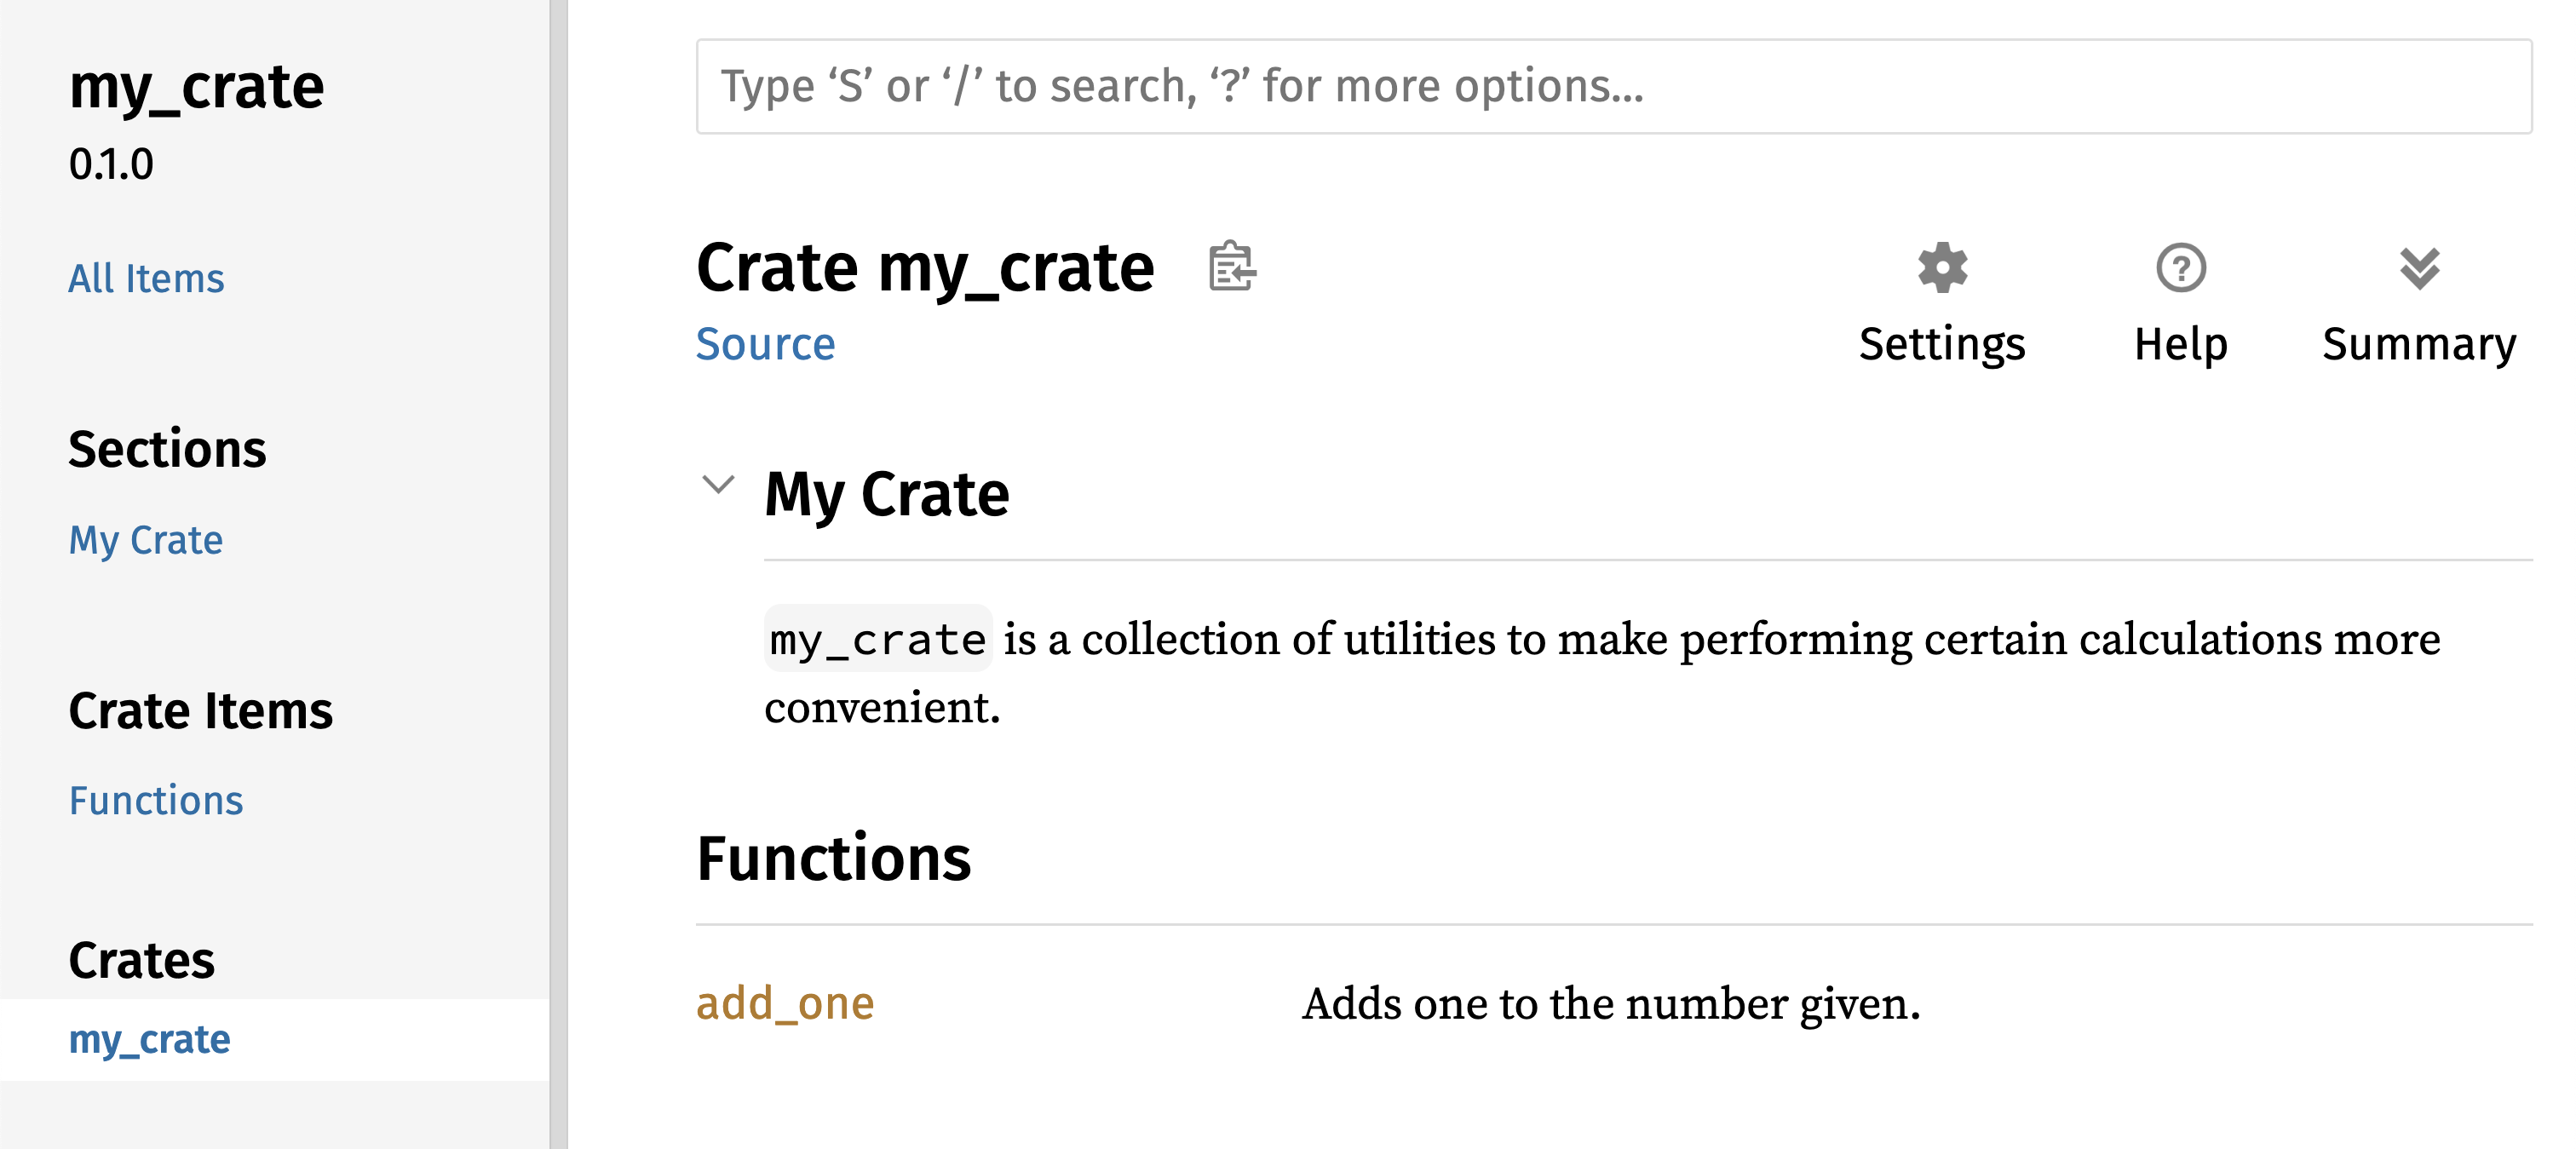
Because we started the comments with //! instead of /// , this inidcates we are documenting the item that contains this comment rather than an item that follows his comment.
In this case, that item is the src/lib.rs file which is the crate root.
These comments describe the entire crate
When we run cargo doc --open, these comments will display on the front page of the documentation for my_crate above the list of public items in the crate
Here is what the docs would look like
Documentation comments within items are useful for describing crates and modules especially.
Use them to explain the overall purpose of the container to help your users understand the crate's organization
Exporting a Convenient Public API with pub use
The structure of your public API is a major consideration when publishing a crate.
People who use your crate are less familiar with the structure than you.
They might have difficulty finding the pieces they want to use if your crate has a large moudle hierarchy
Before we covered how to make items public using the pub keyword and bring items into a scope iwth the use keyword.
The structure that makes sense to you while you are developing the crate might not be very useful or convenient for your users.
You might want to organize your structs in a heirary containing multiple levels.
The people who want to use a type you have defined deep in the hierary might have trouble finding out that tpye exists.
They might also be annoyed having to enter use my_crate::some_module::another_module::UsefulType; rather than use my_crate::UsefulType;.
The good news is that if the struct isn't convenient for others to use from another library, you dont have to rearrange your interal organization.
You can instead re-export items to make a public structure that is different form your private structure by using pub use.
Re-exporting takes a public item in one location and makes it public in another location as if it we defined in the other location instead
For example lets say we made a libarary named art
Within this library there are two modules:
- a
kindsmodule containing two enums namedPrimaryColorandSecondaryColor - a
utilsmodule containinga function namedmix
Here is what it would look like in src/lib.rs
//! # Art
//!
//! A library for modeling artistic concepts.

pub mod kinds {
    /// The primary colors according to the RYB color model.
    pub enum PrimaryColor {
        Red,
        Yellow,
        Blue,
    }

    /// The secondary colors according to the RYB color model.
    pub enum SecondaryColor {
        Orange,
        Green,
        Purple,
    }
}

pub mod utils {
    use crate::kinds::*;

    /// Combines two primary colors in equal amounts to create
    /// a secondary color.
    pub fn mix(c1: PrimaryColor, c2: PrimaryColor) -> SecondaryColor {
        // --snip--
    }
}
Here is what the frontpage docs generated by cargo doc would look like
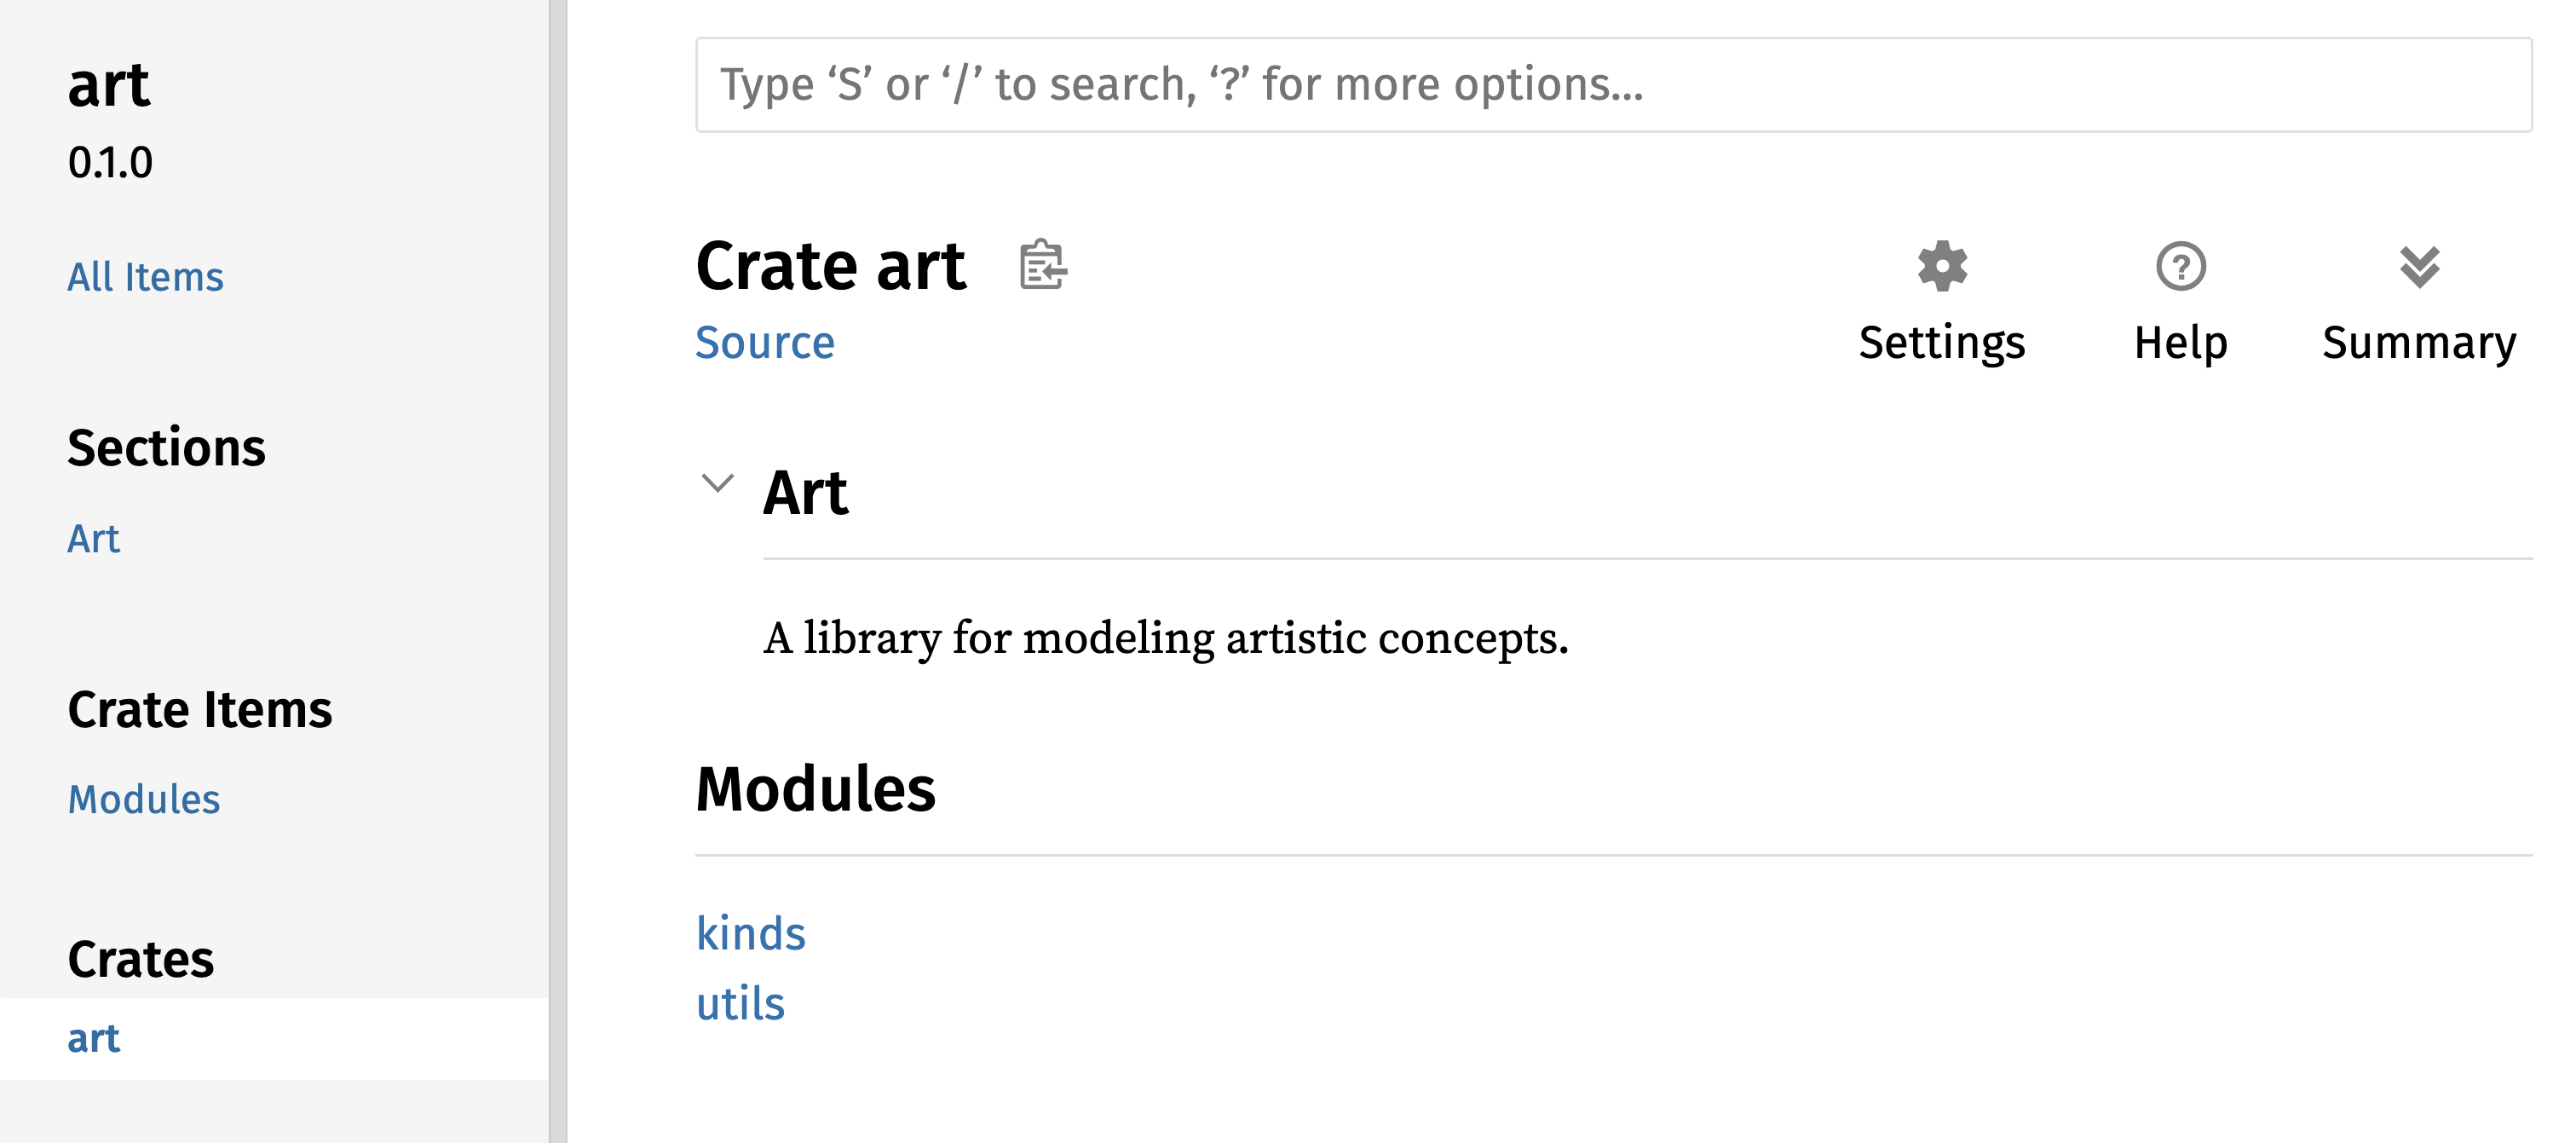
Notice that the PirmaryColor and SecondaryColor types are't listed on the front page nor is the mix function.
We have to navigate to kinds and utils to see them.
Another crate that depends on this library would need use statements that bring items from art into scope. Specifying the module structure that is currently defined
Here is an example of a crate that uses the PrimaryColor and mix items form the art crate
use art::kinds::PrimaryColor;
use art::utils::mix;

fn main() {
    let red = PrimaryColor::Red;
    let yellow = PrimaryColor::Yellow;
    mix(red, yellow);
}
The author of the code in above which uses the art crate had to figure out that PrimaryColor is in the kinds module and mix is in the utils module.
The module struct of the art crate is more relevant to developers working on the art rate than to those using it.
The internal structure doesn't contain any useful info for someone trying to understand how to use the art crate, but rather causes confusion becasue devs who use it have to figure out where to look and must specify the module names in the use statements.
To remove the interal organization from the public API, we can modify the art crate to add pub use statements to re-export the items at the top level
//! # Art
//!
//! A library for modeling artistic concepts.

pub use self::kinds::PrimaryColor;
pub use self::kinds::SecondaryColor;
pub use self::utils::mix;

pub mod kinds {
    // --snip--
}

pub mod utils {
    // --snip--
}
The API docs that cargo doc generates for this crate will now list and link re-exprots on the front page.
This makes the PrimaryColor and SecondaryColor types and makes finding the mix function easier
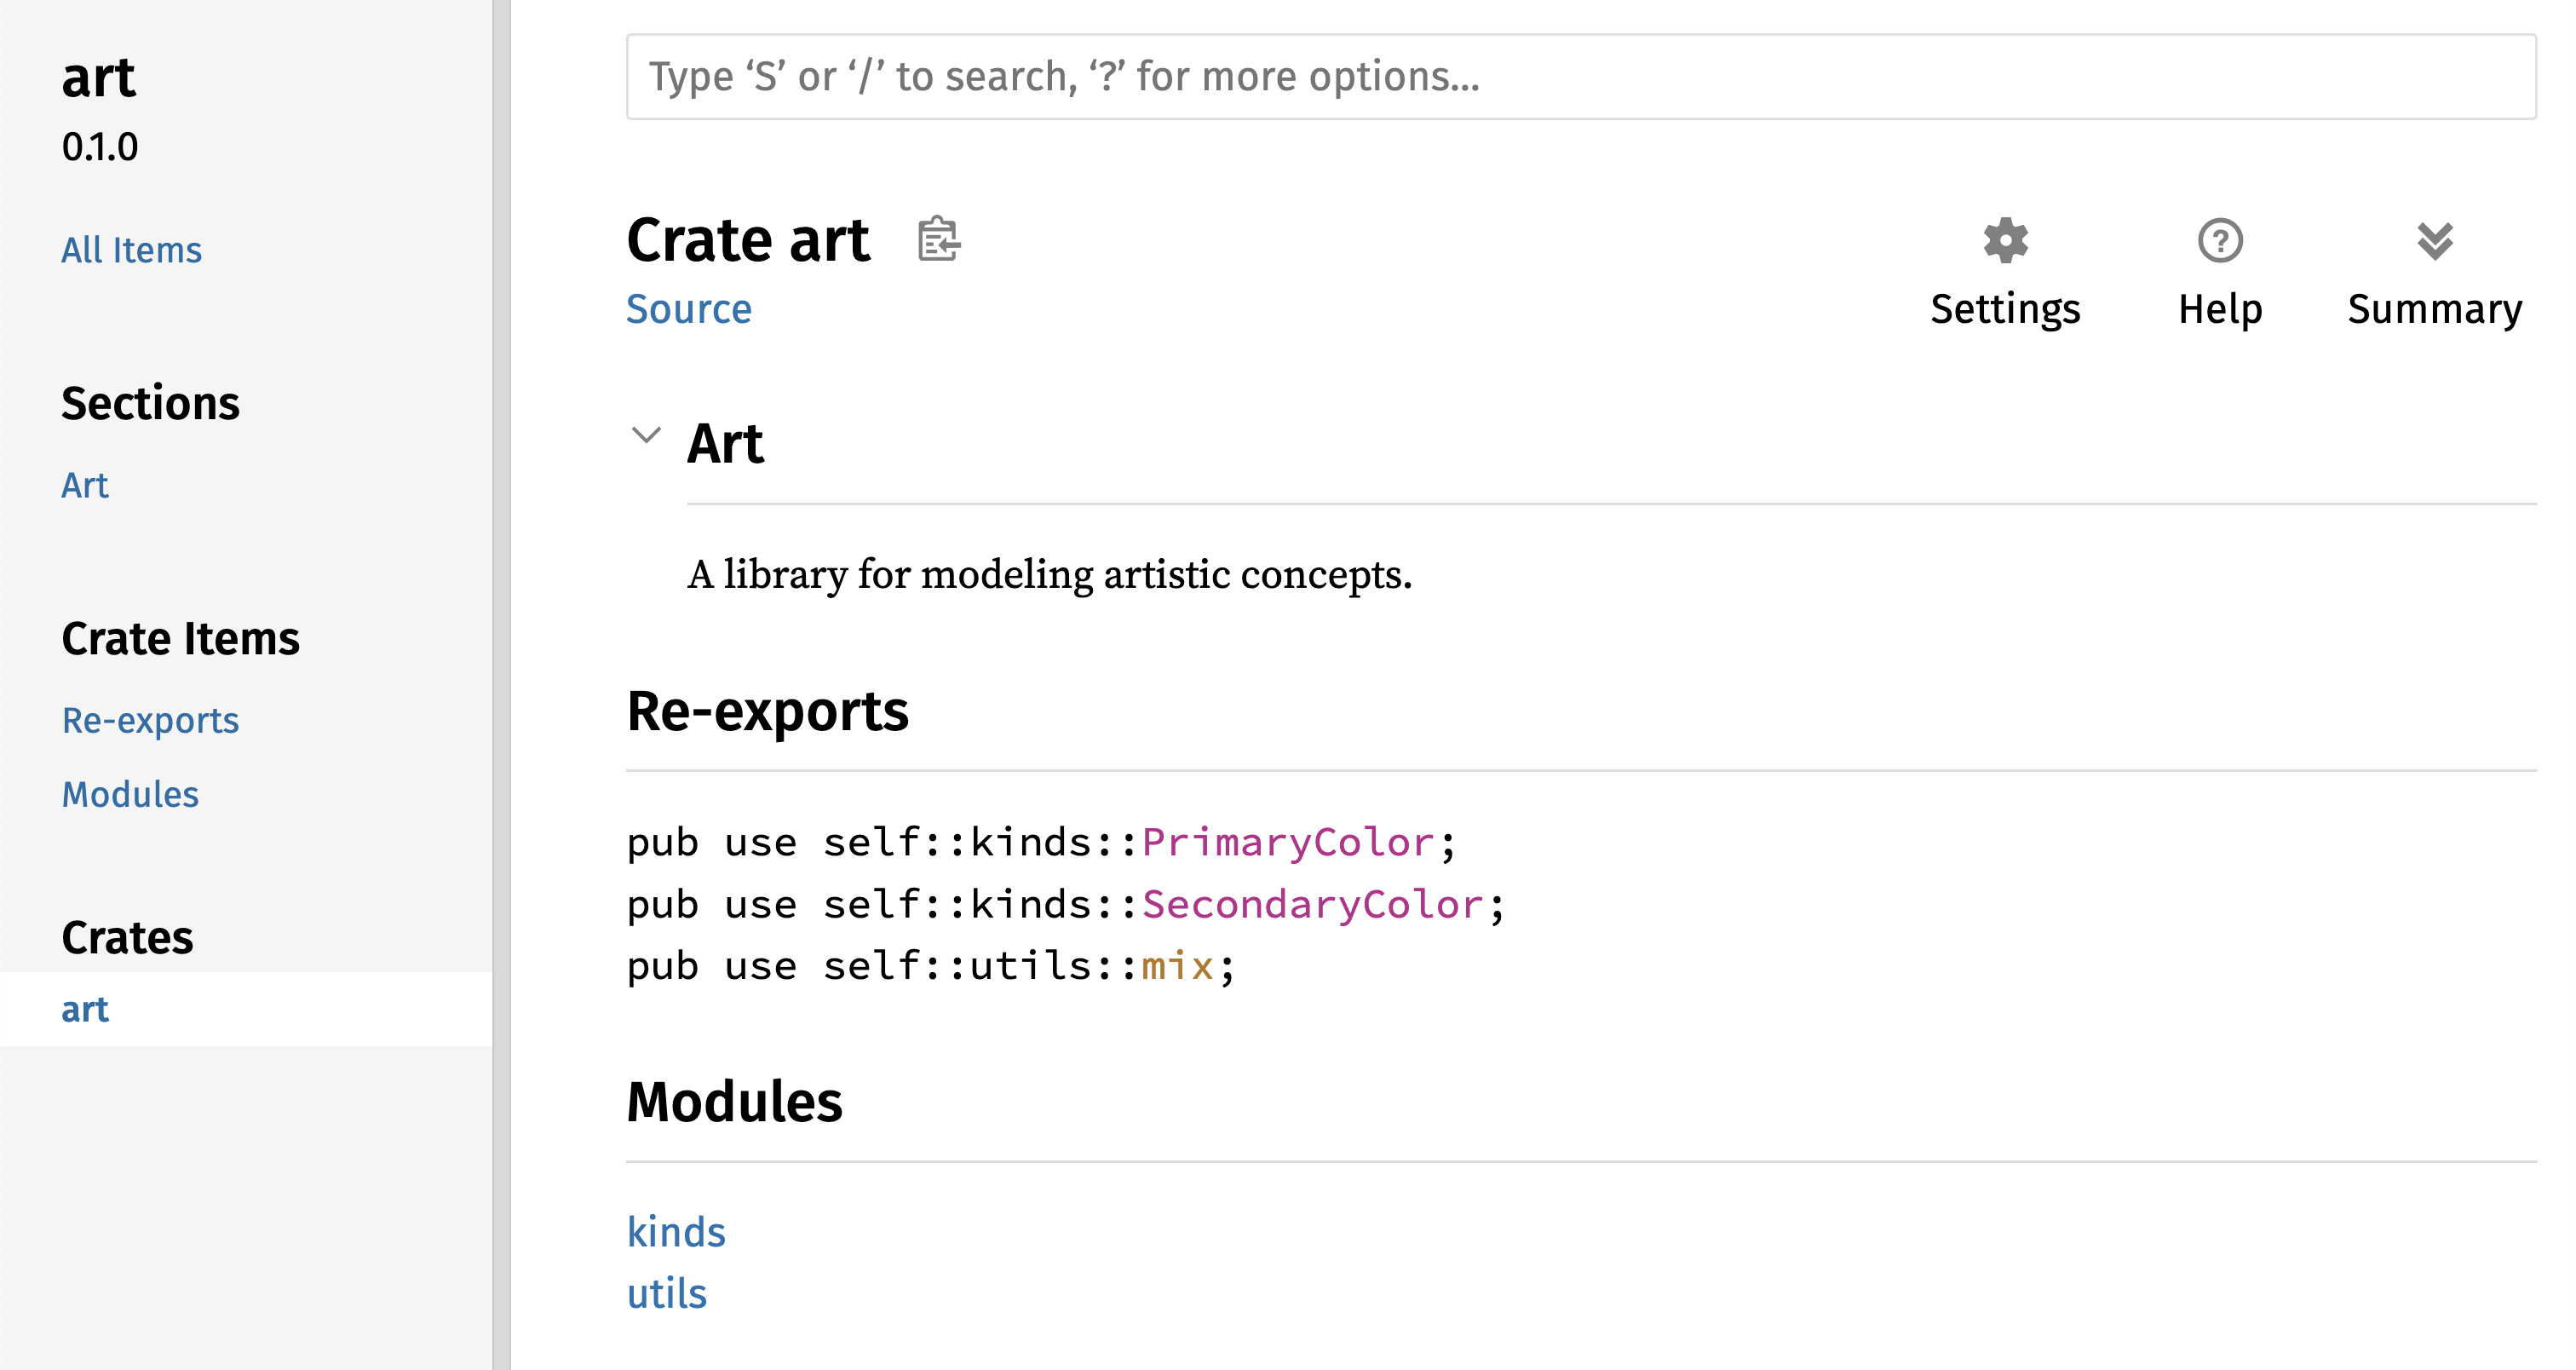
The art crate users can still see the internal structure as demonstrated in the picture above.
They could also use the more convenient structure like in the example below
use art::mix;
use art::PrimaryColor;

fn main() {
    // --snip--
}
In cases where there are many nested modules, re-exporting the types at the top level with pub use.
This can make a very significant difference in the experience of people who use the crate.
Another common use of pub use is to re-export definitions of a dependency in the current crate to make that crate's definitions part of your crate's public API.
Creating a useful public API structure is more of an art than a science.
You can iterate to find the API that works best for your users.
Choosing pub use gives you flexibility in how you structure your crate internally and decouples that interanl struct from what you present to your users.
Look at some of the code of crates you have used previously to see if their internal struct differs from their public API.
Setting Up a Crates.io Account
Before being able to publish creates, you need an account on crates.io and get an API toekn
You can do ths by
- visit the homepage at crates.io
- Log in via a Github account (could use any other type that is supported)
- Once logged in, go to your account settings at https://crates.io/me/
- Retrieve your API key
- Run the
cargo logincommand nad paste the API key when prompted
Here is an example
$ cargo login
abcdefghijklmnopqrstuvwxyz012345
This will inform Cargo of your API token and store it locally in ~/.cargo/credentials
Note that this tken is a secret. DO NOT SHARE IT
You can revoke it and generate a new token on crate.io if you do accidentally share it.
Adding Metadata to a New Crate
Lets say you gave a crate you want ot publish.
Before doing that you need to add some metadata in the `[package] section of the crate's Cargo.toml file.
You need a unqiue crate name.
When working locally you can name a crate anything you like.
However crate names on crates.io are allocated on a first-come, first-serverd basis.
Once a crate name is taken, no one else can publish a crate with that same name.
SUPER GOOD ADVICE: Before attempting to publish a crate search for the name you want to use.
If the name has been used, you will need to find another name and edit the name field in the Cargo.toml file under the [package] section to use the new name for publishing.
Here is an example of this
[package]
name = "guessing_game"
Even if you chose a unqiue name when you run cargo publish to publish the crate at this point you will get a warning then an error.
Here is an example of this output
$ cargo publish
    Updating crates.io index
warning: manifest has no description, license, license-file, documentation, homepage or repository.
See https://doc.rust-lang.org/cargo/reference/manifest.html#package-metadata for more info.
--snip--
error: failed to publish to registry at https://crates.io

Caused by:
  the remote server responded with an error (status 400 Bad Request): missing or empty metadata fields: description, license. Please see https://doc.rust-lang.org/cargo/reference/manifest.html for more information on configuring these field
These errors are caused by missing some crucial information:
- A description
- A license
Both of these are required so people will know what your crate does and under what terms they can use it.
In Cargo.toml add a description that that is a sentence or two. This will appear with your crate in search results.
For the license field you need to give a license identifier value
The Linux Foundation’s Software Package Data Exchange (SPDX) lists identifers you can use for this value.
For example to specify that you are licensing your crate using the MIT License add the MIT identifier
[package]
name = "guessing_game"
license = "MIT"
If you want to use a license that isnt in te SPDX, you will need to plcae the text of that license in a file.
Include that file in your porject and then use license-file to specify the name of that file instead of using the license key.
Guidance on which license is appropriate for your project is a highly personal and higly techincal.
Please read through the license to pick the most approprate one for your case use with any considerations to dependances.
Many people in the Rust community license their projects in the same way as Rust by using a dual license of MIT OR Apache-2.0
This demonstrates that you can also specify multiple license identifiers separated by OR to have multiple licenses for your project.
With a unique name, the version, the description and a license added. The Cargo.toml file for a project that is ready to publish would look similar to this:
[package]
name = "guessing_game"
version = "0.1.0"
edition = "2021"
description = "A fun game where you guess what number the computer has chosen."
license = "MIT OR Apache-2.0"

[dependencies]
Cargo's documentation describes other metadata you can specify to ensure othes can discover and use your crate more easily.
Publishing to Crates.io
Now that you have an account, cargo has saved your API otken, chosen a name for your crate and specified the required metadata. Yuo are ready to publish.
Publishing a crate uploads a specific version to crates.io for others to use.
A Publish is PERMANENT.
The version can never be overwritten and the code cannot be deleted.
One major goal of crates.io is to act as a permanent archive of code so that builds of all projects that depend on crates from crates.io will continue to always work.
Allowing version deletions would make this goal impossible.
There is no limit to the number of crate versions you can publish.
If you run cargo publish again it should succeed now.
Here is the output now
$ cargo publish
    Updating crates.io index
   Packaging guessing_game v0.1.0 (file:///projects/guessing_game)
   Verifying guessing_game v0.1.0 (file:///projects/guessing_game)
   Compiling guessing_game v0.1.0
(file:///projects/guessing_game/target/package/guessing_game-0.1.0)
    Finished `dev` profile [unoptimized + debuginfo] target(s) in 0.19s
   Uploading guessing_game v0.1.0 (file:///projects/guessing_game)
This is a successful output and indicates you have successfully shared your code with the Rst community and now anyone can easily add your crate as a dependency of their project.
Publishing a New Version of an Exisiting Crate
When you made changes to your crate and are ready to release a new version.
First you change the version value specified in your Cargo.toml file and republish.
Use Semantic Versioning rules to decide what an appropriate nexxt version based on the kinds of changes made.
Finally run cargo publish to upload a new version
Deprecaitng Versions for mCrates.io with cargo yank
Even though you can remove previous versions of a crate, you can prevent any future projects fom adding them as a new dependency.
This is useful when a crate version is broken for some reason.
In such situations, Cargo supports yanking a crate version.
Yanking a version prevents new projects form depending on that version while allowing all exisitng projects to continue to depend on that version.
This essentially means a yank won't break any exisiting projects with a Cargo.lock with that version will not break. But any new Cargo.lock files generated will not be able to use the yanked version.
To yank a version of a create.
- Go to the directory of the crate that has been previously publish.
- Run
cargo yankand specify which version to yank.
For example lets say we have published a create named guessing_game version 1.0.1 and we want to yank it.
In the project directory for the guessing_game crate we would run
$ cargo yank --vers 1.0.1
    Updating crates.io index
        Yank guessing_game@1.0.1
If we wanted to undo that we would add --undo to the command.
This would allow prjects to start depending on that version again
$ cargo yank --vers 1.0.1 --undo
    Updating crates.io index
      Unyank guessing_game@1.0.1
ONCE AGAIN NOTICE a yank does NOT delete any code.
If you accidentally uploaded secrets, you must reset those secrets immediately.